Taking good pictures of your trading cards is easy
With today’s technology, there is no reason to have a blurry, dark, or just plain lousy picture of your cards. If you’re making potential buyers strain their eyes to find the serial number or determine if it’s a refractor, you could lose a sale or a bid.
I’ve come across hundreds of sports card listings where the seller took no effort in making that refractor card “refract.” Or didn’t bother to zoom in and capture a crisp shot of that low-printed serial number on the back? If you want to take excellent pictures of your sports and non-sports cards, you’re in the right place.
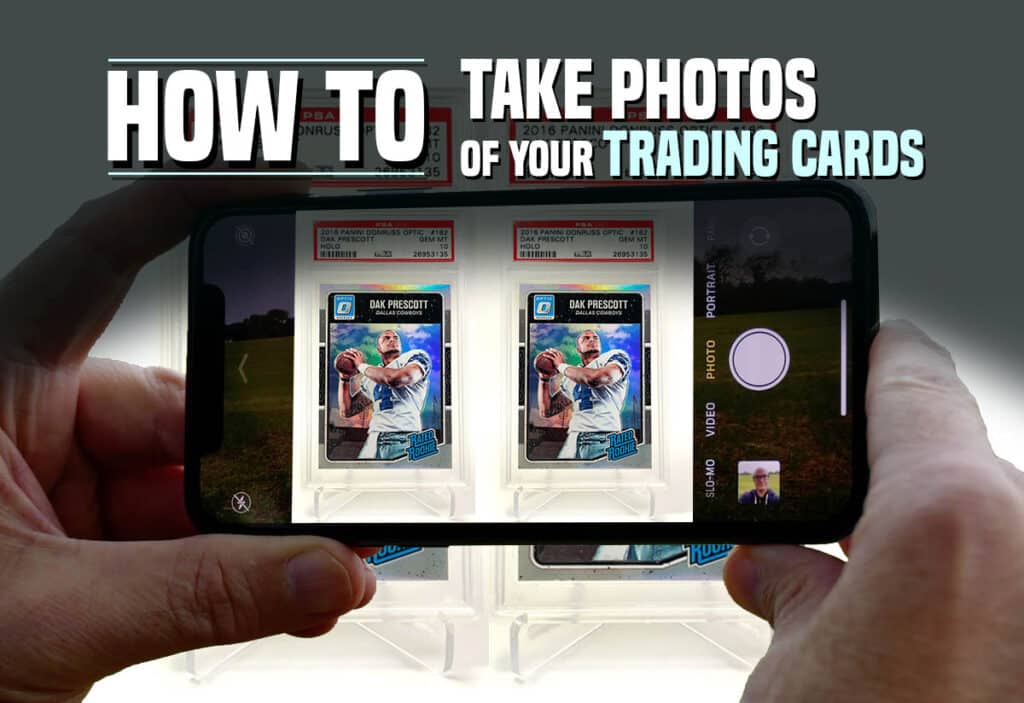
Getting the perfect angle is tricky.
Trying to hold your camera directly in front of the card while maintaining the perfect light balance and capturing the essential details can be tricky. I’ve held my camera in many awkward and uncomfortable angles, fighting that dreaded glare from an overhead light or trying to zoom in on the serial number or an imperfection. After many years of taking pictures of cards, I’ve discovered a foolproof way to take simple and fast photos that will stand out from the competition.
What if I have a scanner?
If you have a scanner that does a good job scanning cards while in a top loader, then, by all means, use the scanner. You can scan multiple cards at once, and they do an excellent job lighting the card evenly. Something I don’t like about scanners is the fact that a lot of sellers use them. In my opinion, the images look flat and dull and blend in with everyone else’s. Taking pictures of your sports cards at the perfect angle can make even the most common base card look attractive to buyers.
If you’re trying to scan graded cards, you need a specific scanner to have those sharp, crisp images you see on eBay. If you do not have the correct scanner, you will be left with one option: taking a picture. Check out my article on some of the best scanners for scanning graded and raw cards.
Why bother taking good pictures of your sports cards?
This will strengthen the buying impulse, which could lead to a sale. The card’s condition is a significant factor determining the value of both sports and non-sports trading cards. Having good-quality photos will help determine what condition the cards are in.
Are the corners sharp? Does the surface have scratches or dents? How solid is the color on the borders and edges?
These are all questions most collectors ask themselves before purchasing a card. Having an image that is blurry, dark, or doesn’t show the entire card could prevent buyers from purchasing from you.
Be sure and show the back of the card.
I’ve come across many listings that only have images of the front of the card. Why would someone pay premium prices for a card they haven’t seen the back of? Better yet, how can a seller expect someone to pay for a card when they don’t show them the back? Are they trying to hide something?
Is there significant damage or horrible centering? That’s what I think when I come across a listing with only the front image listed. Showing photos of the back is just as important as the front. eBay allows you to upload up to 9 images for free! Don’t be lazy to upload more than one image.
Premiums prices for better images.
When selling your cards online, you want to display them as you would at your home in your collection. It is essential to show how awesome and great they will look in the potential buyer’s collection.
A sharp, well-lit, and accurate photo of your cards is crucial. If your card is in pristine condition, you want to show off the proof. I have paid premiums for cards listed as “pristine” or Gem mint condition. I’ll buy it as long as there is photographic evidence of both the front and back of the card. I only buy cards I want to submit to PSA, so seeing high-quality images that I can thoroughly inspect myself makes me feel better about buying.
Not documenting any damage can be costly.
You want to let buyers know if your card has significant surface damage or a rounded corner. A better image of a card with flaws is more important than a card without any. Trying to hide any damage or imperfections by taking bad pictures will bring no good. It will only result in negative feedback and wasted money on paying return shipping fees.
I have come across numerous high-end cards with heavy price tags and inferior images. I even got suckered into buying one, thinking it was a good deal. After receiving it, I discovered that the pictures were blurry for a reason. Luckily eBay takes the side of the buyer in the return process. However, as a seller, this is not good. This is why you must take good photos of any damage.
Check out this article if you need more information on how to grade a card.
Good vs. Bad examples
Looking for poorly taken photos of cards listed online will take no time. There are thousands! I’ve found a few examples of what not to do. I’ve also taken a few pictures to show what it could look like.
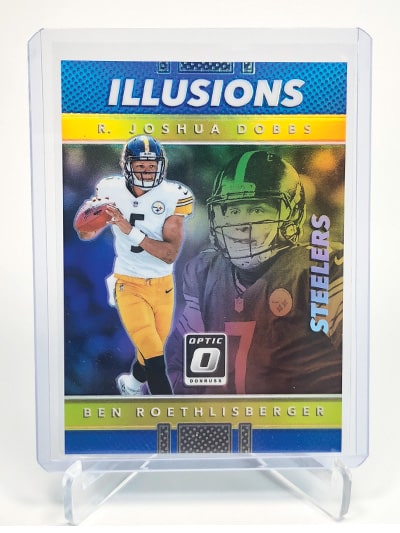
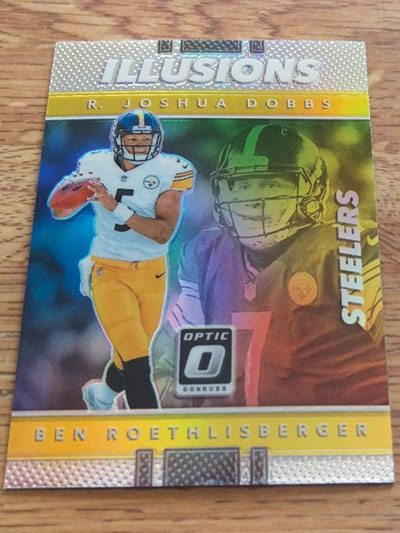
I pulled some photo examples that have room for improvement from eBay and listed them below in the right column. I took a photo utilizing my setup of a similar card, shown on the left, to show what the photo could look like. These cards don’t have the highest price tag, but they are still highly collectible.
Every card you sell should be sold as if it were your “most valued” card.
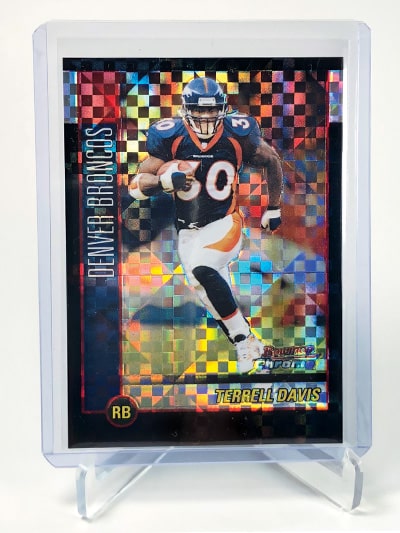
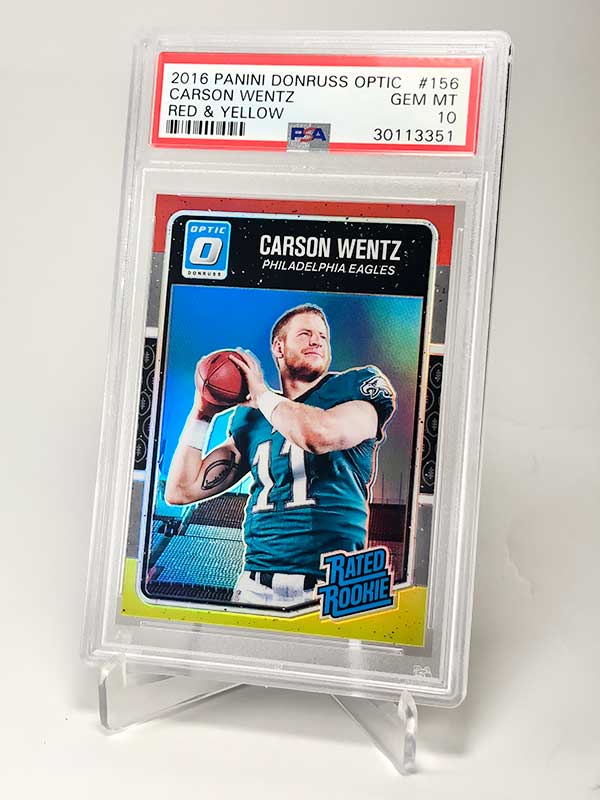
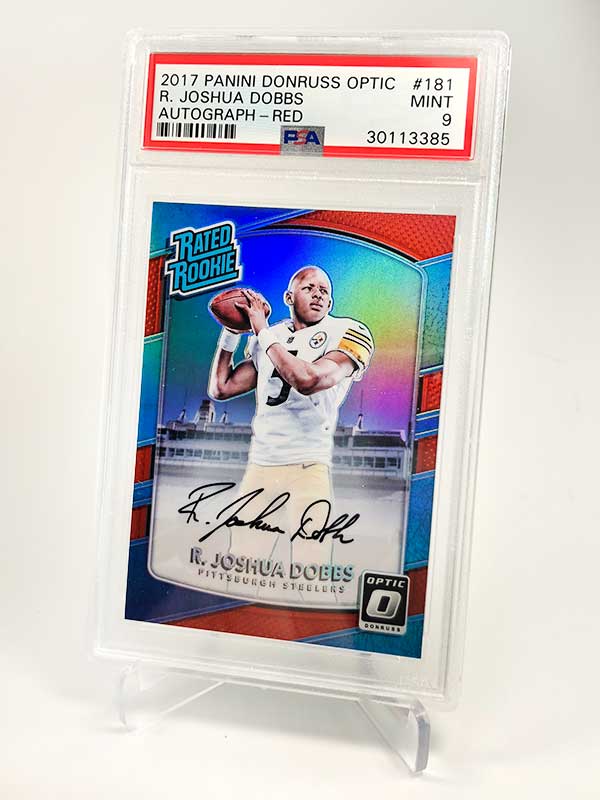
Use a penny sleeve & a top loader
Whenever you list a raw un-grade card on eBay, you always want to put the card inside a penny sleeve and then a top loader protector or Grading Candidate holder. The images shown below are ideal for listing this card. It is sharp, crisp, well-lit, and well-protected. You should always protect your cards in fresh penny sleeves and top loaders. Especially rookie refractors.
An example of a well-protected card
An example of not using protection
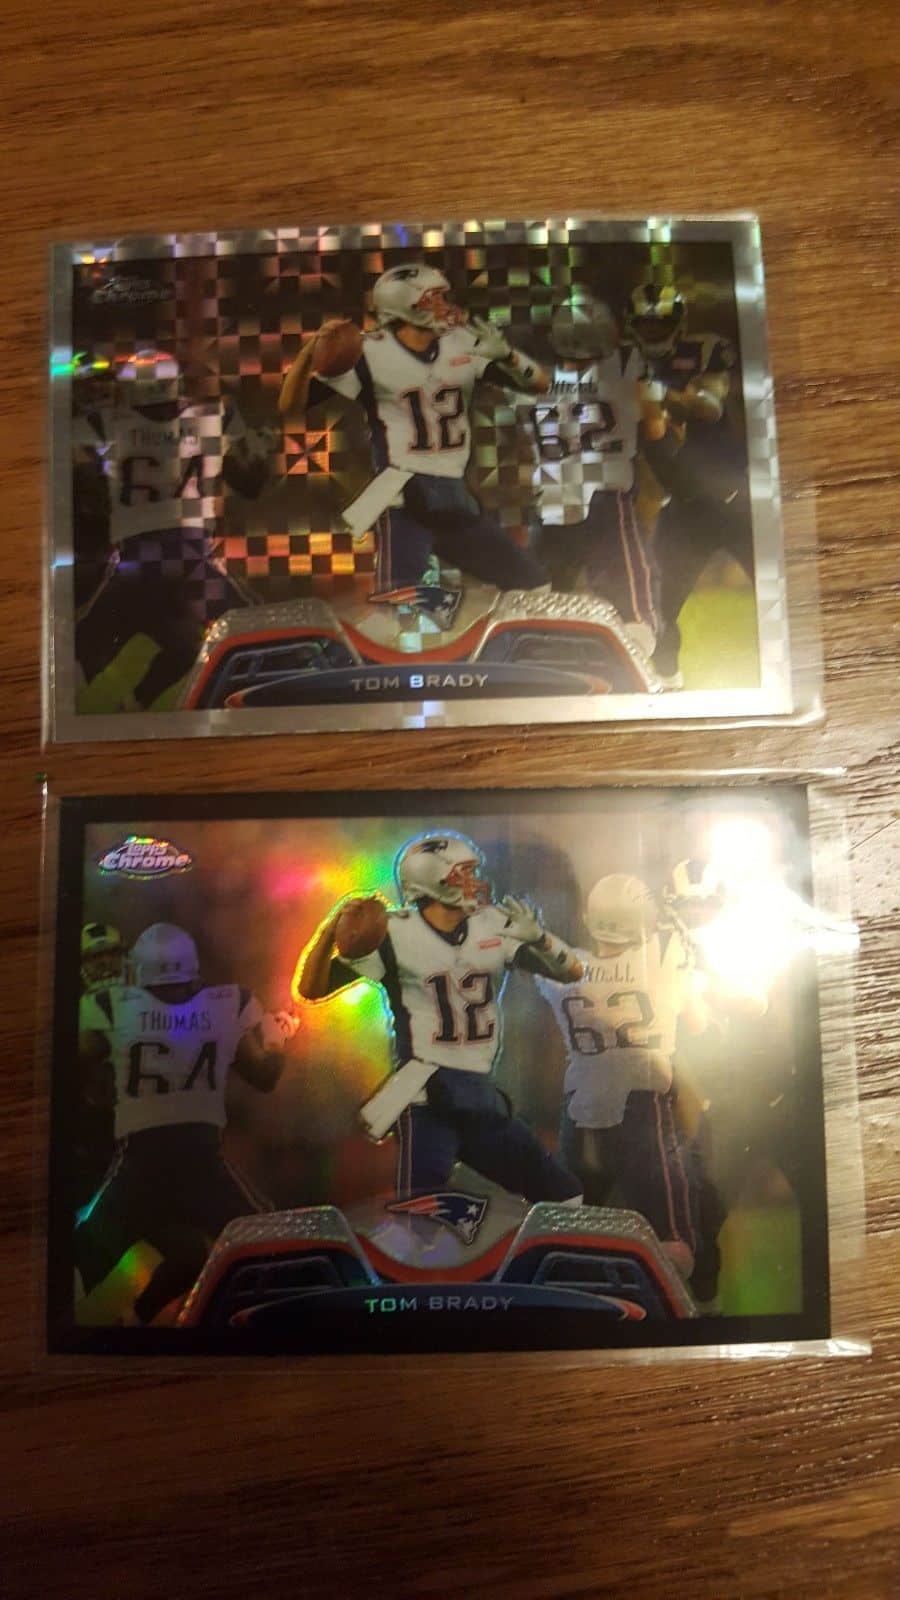
Don’t have light glare or low light.
That awful light glare can destroy the wow factor of any card. In the photo below, you can see the Tom Brady refractor cards being covered entirely by it. These cards are highly collectible, and the seller chose to upload this photo.
The light is dark and highly unbalanced, which makes it hard to tell what cards you are looking at. A well-lit, glare-free image like the one on the left would make these cards sell much quicker and potentially with a higher price tag.
An example of good lighting
An example of bad lighting
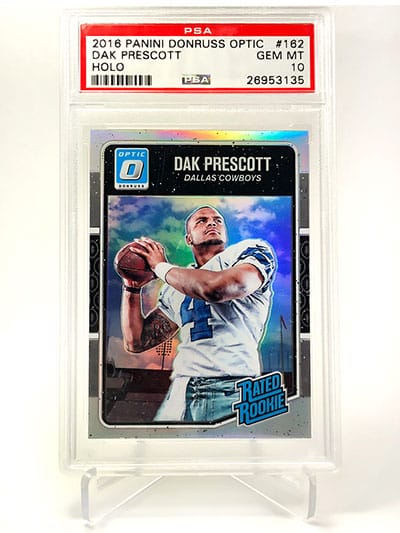
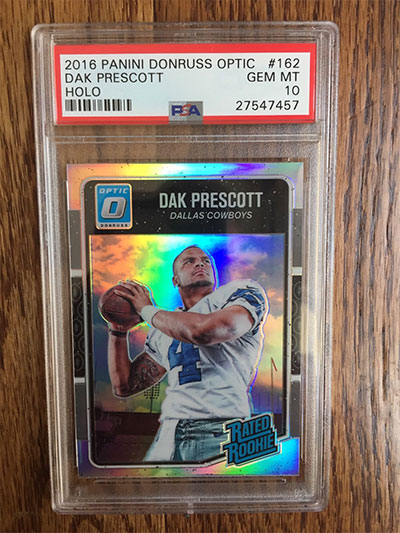
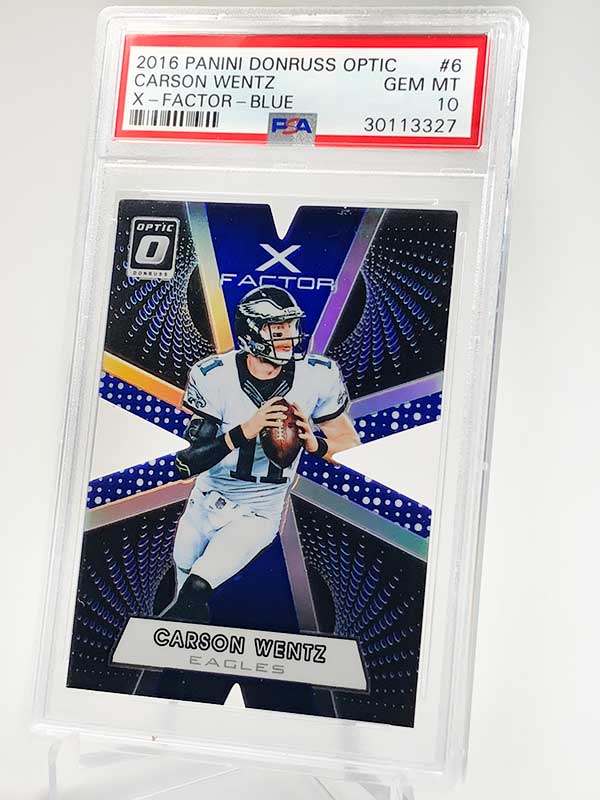
Do not have busy backgrounds in your photos.
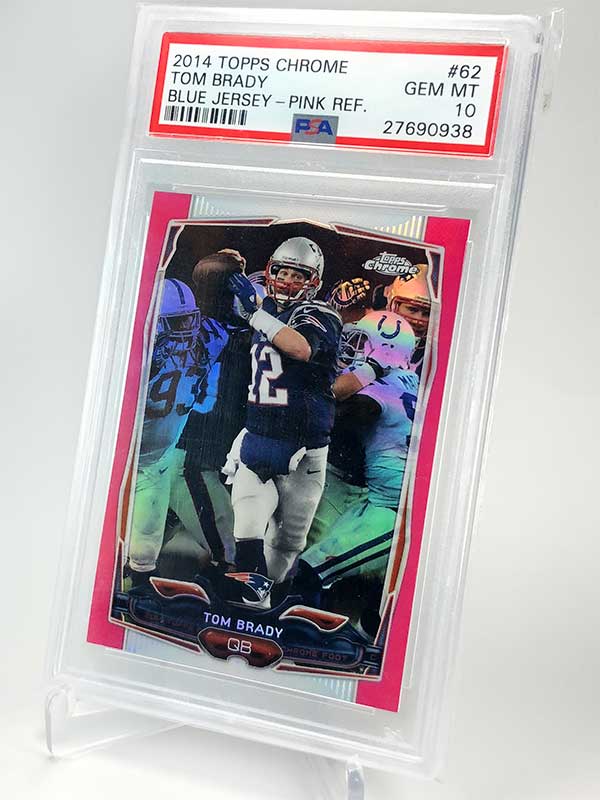
Having a clean background is essential. It allows the eye to focus on what’s important, like that PSA GEM Mint 10 label!. Using a white background is recommended, but I’ve seen other solid colors used that work. Stay away from any texture backgrounds or busy backgrounds. Again, the buyer’s eyes must focus on the card, not the background.
The light is dark and unbalanced, making it hard to tell what cards you are looking at. A well-lit, glare-free image like the one on the left would make these cards sell much quicker and potentially with a higher price tag.
An example of a clean background
An example of a busy background
Supplies you’ll need before taking awesome pictures.
To get started, you’ll need a few things. Below is a list of supplies I use and recommend. I’ve linked everything to Amazon for your convenience. A new page will open, so don’t worry about being redirected from this site.
#1. Use Penny Sleeves & Top Loaders.
If the card in your picture is laying on a tabletop or the carpet is raw, this will detour buyers from buying. Most collectors check and see how well the card has been taken care of before bidding or purchasing. Seeing a card in both the penny sleeve and top loader will ensure the buyer that the card has been well protected. This could lead to more sales and higher ending auction prices.
If your card isn’t in a brand-new penny sleeve and top loader, put it in one.
Using old scratched-up top loaders will make the card inside look scratched up and not appealing to the buyer. The importance of storing your cards in brand-new penny sleeves and top loaders cannot be expressed enough. You can pick them up very cheaply online. I suggest buying them in bulk. It’s better to have them and not need them than to need them and not have them.
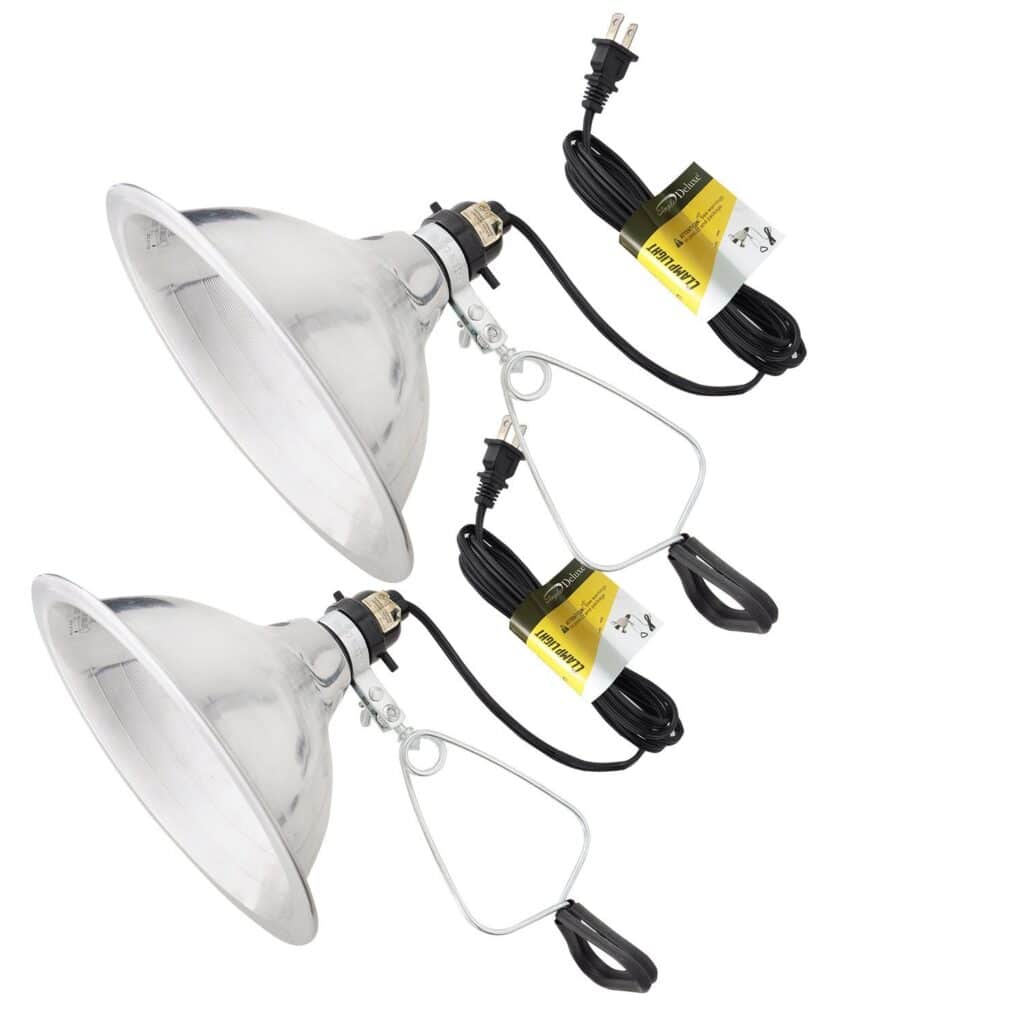
#2. Get a portable and bright lamp.
Clamp Lamp
You’re going to need a very bright and portable light source.
I recommend using a clamp lamp work light or a desk lamp. The clamp will attach to almost any surface, including table tops, curtain rods, thick boxes, etc.
The swivel head will allow you to make minor tweaks and adjustments to position the light at the perfect angle. This lamp will allow up to a 150-watt bulb which is very bright. I use two of them for the ultimate shine and coverage.
Desk Lamp
You might already have a desk lamp you can use, but if not, I listed the one I use below. It’s affordable and comes in handy for many other projects or hobbies. The one downfall is that it’s not as versatile as the clamp lamp but shines just as bright.
There are many lamps available on Amazon at low prices that will work great. The one I just upgraded to works great and can be found here.
Have even lighting on all of your photos.
Having even lighting in your pictures will pull buyers in that may not be shopping for the card your selling. Seeing how beautiful that refractor card is shining is like a bass noticing that shiny fishing lure swimming through the water. They’ll want to swim after it and eat it up!
Having dark and dingy images with that dreaded camera flash or orange coloring will prevent a lot of potential buyers from clicking on your listing. Even if it’s for a card, they’re shopping for it.
Be sure to try different angles for refractors cards.
The card’s lighting can be tricky, especially if it’s a refractor. Too much light can white out essential details like the player’s name or serial number. Too little light will make a refractor-type card not look like a refractor. The glare from the top loader can also get in the way if the angle is off. Luckily I have discovered a foolproof way to get around the glare.
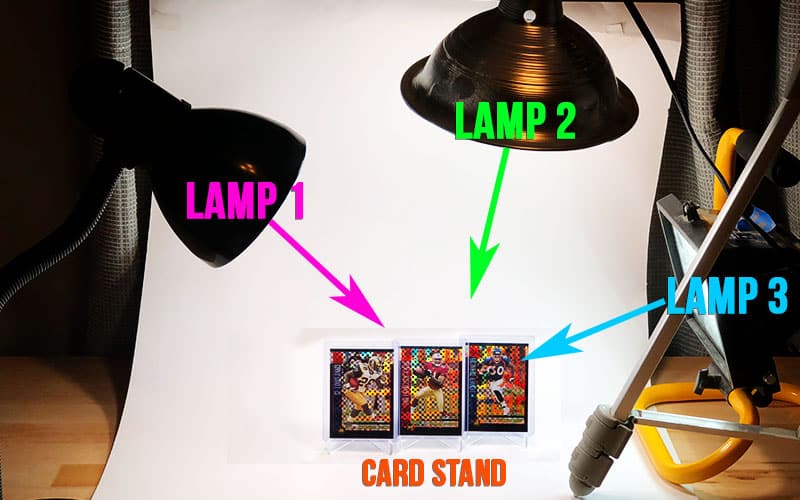
I use three light sources one on the left, one on the right, and one on top facing downward. This ensures the card is evenly light with minimal shadows. If you have a desk lamp and work light already available great. Skip to which light bulbs I use. If not, I’ve listed some lamps below that I use. Keep in mind the brighter, the better. Look for lamps that offer high-wattage light bulb usage. 150 watts should be sufficient.
#3. Get the correct light bulb
There are hundreds of different light bulbs you can use in these lamps. If you look at the best photos on eBay and other card sites, you’ll notice they are bright white. Similar to what the scanners use.
They don’t use the warm orange low kelvin bulbs. I’ve tried using the 3500K bulbs, but the cards do not look bright or crisp. I suggest experimenting with this and figuring out what works best for you.
I buy the 5000k dimmable packs and use them in both my lamps and the lights in my office. This allows me to have a well-balanced light that is not too bright nor too orange. Everyone has different setups and environments, so experiment on which bulb will work best for you.
#4. Use a card stand
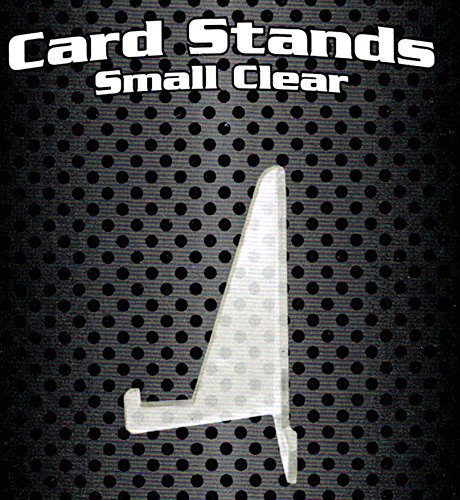
Laying your cards down flat makes it tough to get a solid shot without having glare from the light source or having your camera in the reflection. Using a card stand works great for standing my cards straight up and allowing me to move the camera around for the best shot.
I feel that cards in the standing position are also in the “display” position, which makes them much more attractive to buyers. They can envision what it will look like standing up on their shelves at home. This will make them more prone to hit that buy-it-now or place-bid button.
#5. Use a decent camera
Notice how I said decent and not expensive. You don’t need to break the bank and purchase a $900 DSLR camera to photograph your cards. Any smartphone camera will work fine. As long as it shoots in 12 megapixels or more, it would be best to get clean and crisp photos.
If you have a DSLR camera and want to use it, more power to you. I have one, and I only use it when taking pictures of more than ten cards for large lots. If you don’t have a smartphone, ask someone you know to borrow theirs.
You can also buy a cheap older iPhone on eBay or Amazon and use the camera. You don’t have to set up a wireless service to use the camera function. I did this for a month or two with an old iPhone 4 lying around the house. It worked great!
My setup for taking pictures
First, you want to set up a clean area on a large table or desk in a room that will be dark without the lights on. You can use the kitchen table or countertop for older or non-refractor cards. I find that dark rooms work best for allowing prisms and refractors to shine bright like they’re made to. An overhead light will reflect in the cards and make it challenging to snap that perfect shot.
The more lamps, the better. I used three lamps in this setup.
1st Lamp is a desk lamp with a 5000k 150-watt bulb 2nd Lamp is a clamp lamp with a 5000K 150-watt bulb 3rd Lamp is a LED luminaire work light top covers the shadows from behind
You’ll want to set up your lamps to cover every angle. Point the heads of the lamps towards the card stand and place the card on the stand. Turn off the lights in that room and remove any other light source that could interfere. You only want the light from your lamps to be on. You may need to add more lamps to the equation if there is insufficient light.
Turn your camera on and start snapping some awesome, clean, sharp photos!
By now, you should see the power of the lamps in a dark room. I started to see it immediately and was thrilled. Depending on the card type, your photograph will decide which light bulb you should use. I found the 5000K bulb worked well for just about any card but feel free to experiment with this.
Below is a list of results I achieved
Should you use Photoshop to edit?
If you have Photoshop or have ever used it, you know the power of its editing capabilities. I rarely use it for editing my pictures for eBay, but when I do, it’s for cropping and adjusting the brightness. Never use Photoshop or editing software to remove defects from your cards or collectibles. This is simply false advertising.
Photoshop for adjusting the brightness and contrast or cropping the images works excellently. Let’s say you want to create a large 100-card lot of some 1955 Topps football cards, and capturing an image of them all together in the same photo doesn’t do them justice.
Cropping for large lots
You can snap a photo of each card with the above method, open them in Photoshop, and crop them around the corners of the top loader. After cropping each card to the top loader size, you can add them all to the same image next to each other. Each card will be sharp, crisp, and well-lit. Getting the perfect photos of large lots with scanners or taking “group” photos will not be the same as the individual image lot.
This can be very time-consuming, but the work will ultimately pay off. You will attract potential buyers who catch the beauty of your hard work. I suggest listing lots like this at a premium because no others on eBay will like it. Being the only available lot could raise a lot of attention.
Adjusting the brightness and contrast
Adjusting each card’s photo brightness, contrast, and other settings can be daunting. This is one of the main reasons I started taking pictures of my cards with the above setup. It allows me to snap the photos and upload them directly to eBay without all the editing. Although this setup works great for most cards, there have been times when I couldn’t get the right shot with this method.
The Topps Chrome base cards are tricky because they work like a mirror. When you hold your camera in front of the card, it reflects that on the card. With countless different types, styles, and categories of trading cards, finding a system that works for them is pretty tricky. My setup has worked on most of the cards I collect and sell, refractor types. When I encounter a card that doesn’t want to cooperate, I’ll take the photo at an angle with not-so-great lighting and then adjust the setting in Photoshop.
Yellowing background and shadow correction
Photoshop is excellent for those off-white, yellow backgrounds and undesirable shadows that haunt our photos. Adjusting the color curve setting and lifting the brightness will fix that. Doing this to every photo is time-consuming so add more lighting to your setup if you have yellow backgrounds or shadows. You may also want to consider experimenting with different light bulbs. Try going up to a 6500K bulb.
eBay’s editing tools
eBay has built-in photo editing software that allows you to adjust the brightness and contrast of your pictures. I’ve used this and have found it useful for quick and dirty editing. I do not suggest using any filters, but the cropping and brightness/contrast compare similarly to Photoshop.
Conclusion
As you can see, the photos are attractive and professional looking. This setup can be expanded even bigger for larger lots with multiple cards. I suggest experimenting with this and seeing the different results you get.
I find this the easiest and most efficient way of taking photos of my cards for listing on eBay or any online store. Taking photos allows you to capture the true beauty of a card as opposed to scanning them, resulting in flat and dull images.
From a young age, Matt dove deep into sports card valuation, turning to esteemed price guides like Beckett and Tuff Stuff. Eventually he extended to Pokémon, Magic: The Gathering, and Yu-Gi-Oh!. With a vision to sustain and nurture the hobby he loved, Matt established the ‘Graded Card Investor’ YouTube channel and website. He aims to foster a healthy community and offer invaluable insights to those entering the world of sports cards and TCGs. His depth of understanding, from the card market’s 2020 pinnacle to its 1990s valleys, is consistently fortified by meticulous research.

There is some good tips here! One thing that can help with the Topps Chrome-type cards is putting a small hole in a 1′ x 1′ square of cardboard just bg enough for the camera of your phone with a taped strap where your hand rests holding the phone to the hole. This stops any shadows or reflections of yourself from showing up in the photo.
Hoping to win the graded case!